Company Information
Ask for more detail from the seller
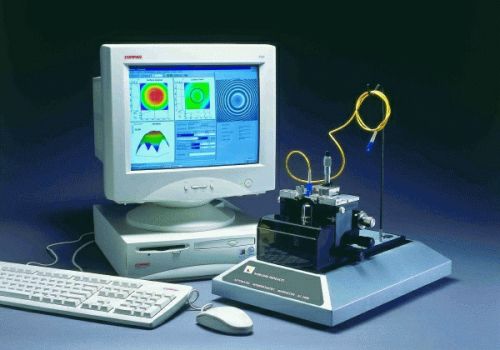
Contact SupplierThe Norland AC-3000 is a fully automated, non-contact interferometric microscope designed for
measuring the endface geometry of fiber optic surfaces such as connector assemblies, ferrules, and
optical fibers. Using a versatile inverted microscope with a built-in camera and a high-speed
computer, the AC-3000 provides immediate 3D topographical information on the surface being
inspected.
Specifically designed to measure the key parameters of PC polished connectors, the AC-3000 measures
the radius of curvature, offset of polish, undercut, or protrusion on FC, ST ® , SC, LC, and MU type
connectors. In addition, this system can measure APC, flat polished connectors, bare ferrules, cleaved
or polished fibers, and sections of multifiber connectors. The feedback from the AC-3000 provides the
user with optimum control of the production process by quickly showing any variation in the polish
quality.
The AC-3000 is a novel system that quickly switches between standard monochromatic phase shift
interferometry (PSI) or white light (broadband scanning) interferometry to handle a wide range of
surfaces. The monochromatic mode allows the system to quickly map smooth surfaces, while the
white light mode uses the latest state-of-the-art technology to measure difficult, rough surfaces and
eliminate ambiguities in step heights. This method provides the “True View” that the monochromatic
mode cannot always measure. Together, the two modes provide extra versatility for analyzing all
types of connectors, for trouble shooting or process development and for measuring fiber protrusion
(undercut or push back) up to four microns above or below the ferrule. Designed for users needing
extreme accuracy, the AC-3000 is capable of measuring fiber height to ±0.002 microns and radius of
curvature and offset of polish to ±0.10 mm and ±1.0 microns respectively. Each unit is supplied with
NIST traceable spherical calibration standards to allow the user to certify the accuracy of the
measurements. No other system provides the customer with this ultimate assurance of performance.
In less than three seconds, the advanced technology of the AC-3000 can obtain the surface topology of a
smooth connector. Coupled with a passfail function, the AC-3000 quickly converts from a valuable
research tool to an indispensable part of a modern quality control system, giving the end user full
control of fiber optic connector quality and performance. The AC-3000 with the Windows 7 operating
system is by far the easiest, most user friendly system on the market today. Simply insert a connector
into the unit, adjust the focus and analyze; the AC-3000 does the rest and results are clearly displayed
on the monitor. Use either the keyboard or the mouse to activate pull down menus, shortcut icons and
online and context-sensitive help. Fast print spooling and multiprocessing capabilities allow a hard copy
print of the information through a standard ink jet or laser printer. Data can be automatically saved,
displayed or printed in Excel for statistical analysis. In addition, custom reports can be generated for
each connector with user selectable images and measurement results (bar code labels and reports can
be printed on one page). The pressure sensitive label can be affixed to the outside of a patch cord bag.
All these data functions are accessed directly in the AC-3000 program. The unit is designed on an
extra stable, inverted microscope base for precision and ease of use. Switching from 2.5 mm connectors
to 1.25 mm connectors is accomplished in seconds with only two thumb screws. Nothing is faster or
simpler. With our new, user-friendly autolevel software, it only takes a minute to calibrate the mount
for sub-micron accuracy in offset measurements. The software also prompts the user to replace the
mount if wear becomes excessive. Our exclusive “Variable Tilt Stage” allows the instrument to be
quickly adjusted for APC measurements. The stage has continuous variable angles from 0 to 13
degrees. A NIST traceable angle standard is available that guarantees accuracy to 0.01 degrees.

